This guide explains how to convert JPG to DST the right way - through proper embroidery file conversion, not a simple "save as." You'll learn why a JPG must be digitized first, what software you actually need, how to prepare your image for clean stitches, and how to export a machine-ready DST file.
To convert JPG to DST, prepare and clean the image, digitize it in embroidery software such as Wilcom, Hatch, or Ink/Stitch, then export it as a machine-ready DST file - there is no true one-click conversion.
If you're trying to convert a JPG to a DST file, you're likely preparing a logo, design, or image for an embroidery machine.
As we often explain at The Embroidery Guys, a JPG cannot be directly converted into a DST file with a simple "save as" action. The process requires embroidery digitizing, which transforms your image into stitch instructions that an embroidery machine can read.
In this guide, we'll walk you step-by-step through the correct way to convert JPG to DST, whether you're a beginner working on a home embroidery machine or running a small embroidery business. You'll learn:
If your goal is to turn a JPG logo into an embroidery-ready DST file without distorted stitches or machine errors, this guide will give you the exact workflow to do it properly.
No, you cannot convert a JPG directly into a DST file. A JPG image simply doesn't contain the stitch information that a DST embroidery file needs, so trying a straight "convert" without digitizing will either fail or produce a poor embroidery result.
At its core, a JPG is a raster picture made up of pixels, great for viewing on screens or printing, but useless to an embroidery machine until it's translated into stitch data.
DST files contain precise instructions, like needle paths, stitch types, stitch lengths, thread trims, and sequence orders, that tell the machine exactly how to sew your design.
That's why any so-called "one-click" JPG-to-DST converter either uses basic auto-digitizing (often with disappointing results) or simply can't do what true digitizing software does.
This is part of a larger industry trend toward digitization.
Globally, the embroidery software and digitizing market is growing rapidly; analysts estimate it will exceed USD 8 billion by 2032, as both hobbyists and businesses embrace computerized design and production workflows.
The term DST stands for Data Stitch Tajima, a proprietary embroidery format developed originally by Tajima, one of the most influential names in the embroidery machine industry.
These files are structured as a list of stitch commands, X/Y coordinates, stitch types, jumps, trims, and stop instructions, that tell the machine exactly how to sew your design, step by step, rather than showing a picture like a JPG or PNG.
Unlike visual formats, DST files are essentially a machine-readable blueprint that bridges the gap between digital design and physical embroidery.
If you're new to the format, our guide on Understanding DST Files explains how these stitch files work.
Almost all major embroidery machines, from Tajima and Barudan to Brother and Melco, support DST format because of its simplicity and universal compatibility.
DST is also one of the most widely supported embroidery machine files in the industry, and you can compare it against All Embroidery Machine File Types to see how it stacks up.
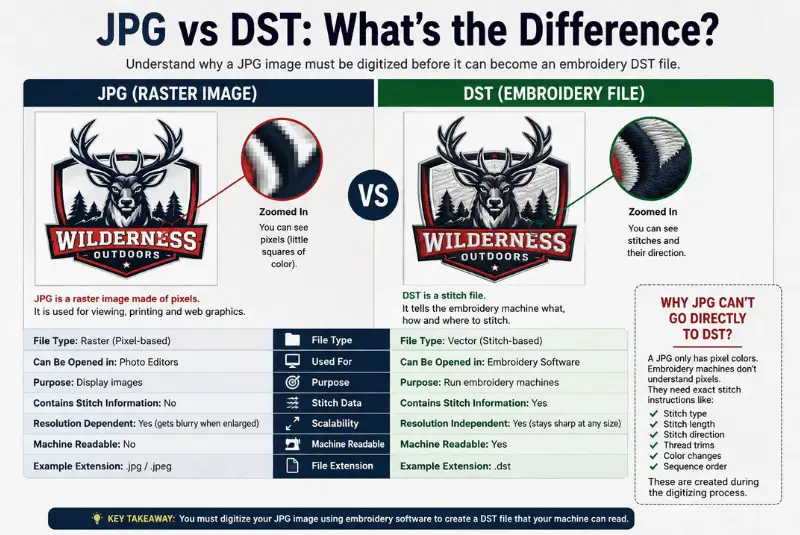
A JPG must be digitized before conversion because JPG and DST are fundamentally different file types, as one stores visual pixels, the other stores machine-ready stitch instructions.
A JPG is a raster image built from colored pixels, perfect for viewing on screens or printing, but utterly lacking the stitch path, density, and direction information an embroidery machine requires.
In contrast, a DST file contains vector-style embroidery commands, needle movement coordinates, stitch types, trims, and thread sequences that control how your design is actually sewn.
There is no way for a machine to interpret raw pixels as stitches without first translating (digitizing) the image into that instruction set.
That's why serious embroidery shops invest in proper digitizing tools rather than relying on basic "convert" utilities that attempt to guess stitch paths from pixels.
This careful, stitch-by-stitch dst digitizing is what separates a clean embroidery file from a distorted one.
| Feature | JPG File | DST File |
|---|---|---|
| File Type | Raster image (pixels) | Embroidery stitch file |
| Purpose | Viewing or printing images | Running embroidery machines |
| Contains Stitch Data? | No | Yes |
| Editable for Embroidery? | Not directly | Machine-ready |
| Stores Color Info | Yes (RGB pixels) | Thread sequence instructions |
| Machine Compatible | No | Yes |
| Requires Digitizing? | Yes | Already digitized |
To convert a JPG to a DST file, you must prepare the image, digitize it using embroidery software, and then export it as a machine-ready DST file, there is no direct one-click shortcut.
Below is the exact workflow we recommend.
The same workflow applies whenever you convert image to DST from other raster formats, not just JPG.
Before you even open digitizing software, clean your image. This step dramatically improves stitch quality.
Start by removing unnecessary backgrounds and isolating the main design.
Embroidery machines handle clean edges far better than gradients, shadows, or complex photographic details.
Simplify your color palette, fewer colors mean fewer thread changes and cleaner stitch sequencing.
Increase contrast so outlines are clearly defined. If the design has thin lines, thicken them slightly; extremely fine details often disappear during stitching.
Resize the image to its intended embroidery dimensions before digitizing to avoid distortion later.
This preparation step is often skipped, and that's exactly why many first-time conversions produce jagged stitches or excessive thread breaks.
While not mandatory, converting your JPG to a vector format like SVG significantly improves control.
A vector file uses mathematical paths instead of pixels, which makes it easier to define precise stitch routes. Clean vector outlines help reduce unnecessary stitch density and prevent uneven edges.
If you're working with logos, converting to vector first ensures symmetry and alignment. For text-based designs especially, vector conversion prevents distorted lettering once digitized.
Think of this step as upgrading your blueprint before construction. It makes the final output cleaner and more predictable.
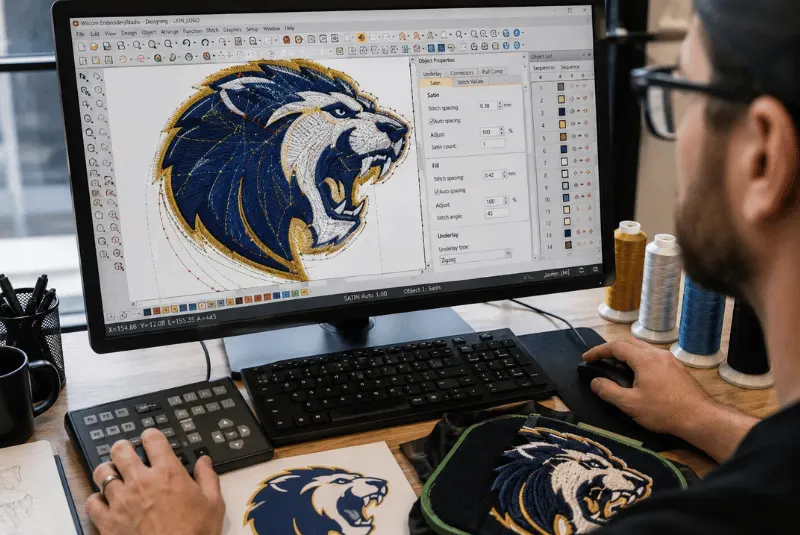
Now open your cleaned (or vectorized) design in embroidery digitizing software such as Wilcom, Hatch, or Ink/Stitch.
Set the correct hoop size immediately. This prevents scaling errors later, which can distort stitch density. Resize your design within the actual embroidery software, not after exporting, because stitch spacing changes when you scale improperly.
At this stage, position the design accurately within the hoop boundary and confirm thread color assignments. Good digitizers think about production efficiency early, not just visual accuracy.
This is the most critical step, and the one most "auto-converters" oversimplify.
Digitizing means manually defining:
Auto-digitizing tools can generate basic stitch paths, but they often create excessive stitch counts and uneven tension. Manual digitizing gives you control over how fabric behaves during stitching.
For logos and commercial embroidery, we always recommend reviewing or refining auto-generated stitches manually. Clean stitch paths reduce thread breaks, improve durability, and produce a smoother finish.
Remember: embroidery is physical production, not graphic display.
Once digitizing is complete, export the design in DST format.
During export:
DST is widely supported, but improper export settings can still cause issues like missing trims or color stops.
Never assume the file is ready without reviewing these details.
Before full production, always run a test stitch-out.
This is where you'll detect:
If your embroidery machine isn't reading the DST file, double-check hoop size, file corruption, and stitch limits. Minor adjustments at this stage prevent costly production mistakes later.
Professionals never skip this step, and neither should you.
If your stitches look jagged, your machine won't read the file, or auto-digitizing isn't delivering the quality you expected, we can help you refine or professionally digitize your design.
If your JPG to DST conversion is not working properly, the issue is almost never the "file format" itself. It's usually how the design was digitized, exported, or tested.
In our experience, most embroidery problems trace back to stitch logic, scaling errors, or machine compatibility settings rather than the JPG source file.
Below, we break down the most common issues we see and how we fix them professionally.
| Problem | Root Cause | Professional Fix |
|---|---|---|
| Jagged stitches | Poor scaling or density | Resize before digitizing, adjust density |
| High stitch count | Auto-digitizing overlap | Simplify fills and remove hidden layers |
| Machine won't read file | Export or hoop mismatch | Re-export, confirm stitch limits |
| Fabric puckering | Excess density or weak underlay | Add underlay, adjust pull compensation |
The difference between beginner and professional digitizing is the level of control over stitch logic, fabric behavior, and production reliability.
When converting a JPG to a DST file, beginners often rely on auto-digitizing tools because they are fast and easy. Professionals, on the other hand, prioritize manual stitch control to ensure predictable results in real production environments.
Below is how the workflows differ and when each approach makes sense.
If you're new to embroidery or working on simple designs (basic logos, single-color graphics, minimal detail), auto-digitizing tools can be a practical starting point.
In a beginner workflow, we typically:
This approach works well when:
However, auto-digitizing often produces excessive stitch counts and inefficient paths. For hobby projects, that may be manageable. For commercial production, it becomes costly.
Professional digitizing focuses on how the design performs on fabric, not just how it looks on screen.
In a professional workflow, we:
This level of control dramatically reduces:
For businesses selling embroidered products, this workflow protects margins and brand quality.
| Factor | Beginner Workflow | Professional Workflow |
|---|---|---|
| Digitizing Method | Auto-digitizing | Manual stitch control |
| Stitch Density Control | Basic adjustments | Fabric-specific tuning |
| Underlay Strategy | Minimal | Structured stabilization |
| Stitch Count Optimization | Often high | Optimized for efficiency |
| Test Stitch-Out | Optional | Mandatory |
| Best For | Hobby use | Commercial production |
If you are:
Outsourcing digitizing to an experienced professional can save time and reduce costly errors.
Professional digitizers understand machine limits, fabric behavior, and stitch optimization techniques that most beginners only learn through trial and error.
If you're learning, experimenting, or working on personal projects, a beginner workflow is perfectly reasonable.
If you're producing embroidery for customers, scaling production, or protecting a brand identity, professional-level digitizing, whether in-house or outsourced, becomes essential.
Ultimately, converting JPG to DST is a production decision. The workflow you choose directly impacts stitch quality, machine efficiency, and final product consistency.
Converting a JPG to a DST file is about translating a visual design into precise stitch instructions your embroidery machine can execute.
The quality of your final result depends on proper preparation, thoughtful digitizing, correct export settings, and thorough testing. Whether you're using free tools as a beginner or professional software for commercial production, understanding the workflow makes all the difference.
When done correctly, a well-digitized DST file ensures cleaner stitches, fewer machine issues, and a professional finish that reflects the quality of your design and your work.
For complex logos, bulk orders, or commercial embroidery, precise stitch logic matters. Let us convert your JPG into a machine-optimized DST file built for clean runs and fewer thread breaks.
Customer satisfaction is our top priority. Feel free to contact us for any queries or assistance. Looking forward to serving you with our top-notch design services
Yes, you can convert JPG to DST for free using open-source tools like Ink/Stitch, but the quality depends on how well you digitize the design. Free tools usually require manual adjustments to stitch density, direction, and underlay to avoid poor stitch-outs.
Yes, PNG is generally better than JPG for digitizing because it supports transparent backgrounds and preserves sharper edges. JPG compression can blur edges and introduce artifacts, which makes stitch path detection less accurate during digitizing. However, both formats still require proper digitizing before exporting to DST.
If you're starting from a PNG, our PNG to DST Conversion Guide walks through the format-specific steps.
For best results, your image should be at least 300 DPI at the actual embroidery size. Low-resolution images can cause jagged edges and inaccurate stitch paths during digitizing.
For simple designs, digitizing can take 10-30 minutes. More detailed logos or multi-color designs may take 1-2 hours or more, especially when manual stitch refinement is required. Auto-digitizing is faster, but professional-quality results usually require additional editing and a test stitch-out.
Most major embroidery machines - including Tajima, Barudan, Brother, and Melco - support DST because it is a widely compatible, universal format. Even so, always confirm your specific machine model, hoop size, and stitch limits before running the file to avoid reading errors.
Already have an account? Login